

How to Convert a Bike to Electric: A UK Guide
In this article
- What a conversion actually involves
- Step 1: Check your bike is a good starting point
- Step 2: Choose hub motor or mid-drive
- Step 3: Choose the battery
- What you need to have ready
- How the conversion goes, step by step
- Mistakes that cause most of the problems
- Do it yourself or have it fitted?
- What does it cost?
- Ready to choose?
- FAQ
Short answer
You can convert most ordinary bikes to electric with a motor, a battery, a controller, a display and a few sensors. Three decisions do most of the work: whether your bike suits a conversion, whether to choose a hub motor or mid-drive, and how big a battery you need. Measure your frame, wheel size, dropout and bottom bracket before you buy, then work through the rest in order.
I’m George Andrusca, founder of All4eBikes and a senior mechanic and electrical engineer. We run the workshop in Cardiff, where we fit and repair both hub-motor and Bafang mid-drive conversions. Everything below is based on the kits and batteries we stock, and the figures link back to the pages they come from.
What a conversion actually involves
An electric conversion adds five things to the bike you already own:
- A motor, either built into a wheel (hub motor) or mounted in the bottom bracket (mid-drive).
- A battery that powers it.
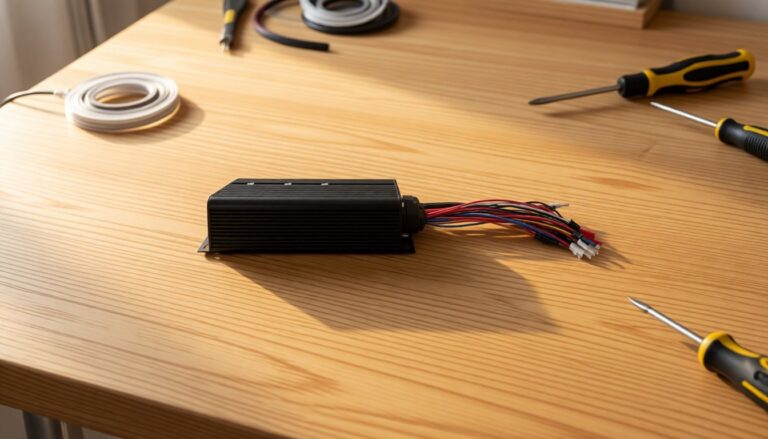
- A controller, the box that decides how much power the motor gets.
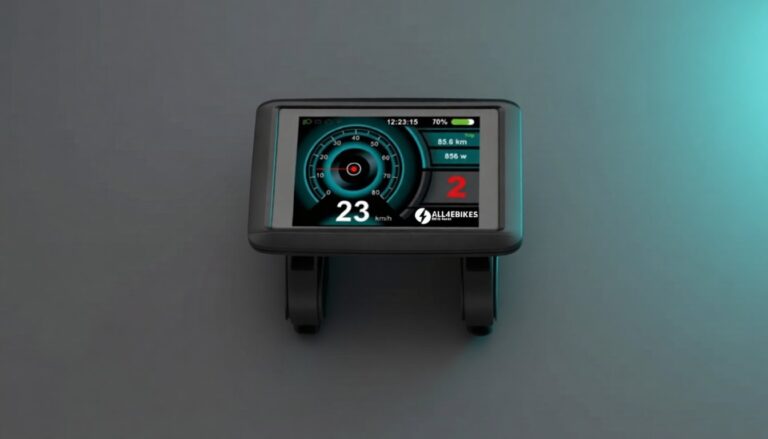
- A display or control unit on the handlebar to switch assist levels.
- Sensors: a speed sensor, usually a pedal-assist sensor, and brake cut-off sensors.
Everything else (brake pads, chain, tyres) is the bike you already have. That is why the first question is not “which kit?” but “is my bike a good starting point?”
Step 1: Check your bike is a good starting point
A conversion adds weight, speed and torque, so the donor bike needs to cope with all three. Look for:
- A sound frame: no cracks, no bent dropouts, no stripped threads.
- Decent brakes. Disc brakes, ideally hydraulic, are the sensible choice; if your brakes are marginal now, they will not improve with a motor on the bike.
- A standard wheel size, such as 26″, 27.5″, 29″ or 700C. A hub-motor wheel has to match.
- A rear dropout you can measure. Note whether it is quick-release or thru-axle and the spacing (135mm, 142mm and 148mm are common).
- Bottom bracket details, if you want a mid-drive. Measure the shell width and check the type. A threaded BSA shell of 68mm or 73mm is the easy case. Press-fit shells (PF30, BB86, BB92) are not directly compatible with the BBS01B and BBS02B.
- Room for the battery: inside the frame triangle, on the downtube or on a rear rack.
Write these measurements down before you buy anything. They decide your options in the next step. If anything on the list looks unusual, send us the details and we will tell you what fits; our full Bafang compatibility check covers the awkward frames in more detail.
Step 2: Choose hub motor or mid-drive
This is the choice that shapes everything else, because the two systems behave differently on the road.
| Hub motor | Mid-drive | |
|---|---|---|
| Where it sits | Inside the rear wheel | At the bottom bracket, driving through the chain |
| Hills | Fine on moderate hills; steep ones can stress smaller hubs | Excellent, because it uses your gears |
| Drivetrain wear | Low, as the motor bypasses the chain | Higher, as motor power goes through chain and cassette |
| Frame fit | Very wide: most bikes with a suitable rear dropout | Narrower: depends on the bottom bracket shell |
| Installation | A wheel swap plus cabling | Bottom bracket and crank work, plus chainline |
| Ride feel | Push from the rear wheel | Power through the cranks, close to a normal bike |
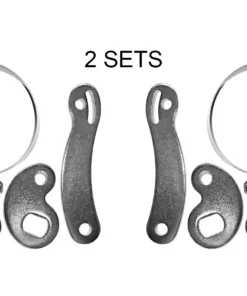
Hub motors are the simpler, cheaper route and suit flat to rolling routes. They also give you the wider power range: our hub kits run from 250W at 36V up to 8000W at 72V. If you go for a hub motor, plan to fit a torque arm so the axle cannot spin in the dropout under load. Browse the rear hub motor kits if that is the way you are leaning.
Mid-drives suit hills and riders who want the bike to feel like a bike. Our Bafang range starts with the BBS01B at 250W (36V, 80 Nm) and goes up through the 750W BBS02B (48V) to the BBSHD at 1000W (48V or 52V, 160 Nm), and each is available with UART or CAN-BUS communication. The Bafang mid-drive kits page lists them all. If you are torn between the first two, our BBS01B vs BBS02B comparison explains why many first-time buyers wish they had gone one step up.
If you live somewhere hilly, read our guide to the best kits for hills before you decide. For the full technical side-by-side, there is a rear hub vs mid-drive comparison.
A note on power and the rules. In the UK a bike with electric assist is treated as an ordinary pedal cycle (an EAPC) when the motor is limited to 250W continuous output, assists only while you pedal, and stops assisting at 15.5 mph (25 km/h). A kit that does not meet those conditions is treated differently, so check the rules against how you plan to ride. Our guide to UK conversion kit rules explains what applies to which kit.
Step 3: Choose the battery
The battery is often the most expensive part of the build, and the one most people size wrongly. Three rules cover it.
1. Match the voltage to the motor. A 48V motor needs a 48V battery. Running the wrong voltage can damage the controller, so check the motor and controller specification first.
2. Work in watt-hours, not amp-hours. Watt-hours (Wh) are voltage multiplied by amp-hours, and they tell you how much energy you are carrying. Some of the batteries we stock:
| Battery | Capacity | Type |
|---|---|---|
| 48V 13Ah | 624Wh | Downtube |
| 48V 20Ah | 960Wh | Downtube |
| Triangle 48V 20Ah | 960Wh | Frame triangle |
| Triangle 52V 25Ah | 1300Wh | Frame triangle |
3. Turn watt-hours into range. As a rough planning figure, easy city riding uses around 7 to 10 Wh per km, mixed riding 10 to 15, and hilly, loaded or cold riding 15 to 25. So a 960Wh battery on mixed terrain gives you something like 64 to 96 km, and a 624Wh battery something like 42 to 62 km. These are estimates, not promises: rider weight, assist level and hills all move them. The range and performance calculator lets you test your own numbers.
Downtube or triangle? A downtube pack bolts onto the bottle-cage bosses and is easy to take indoors to charge; a triangle pack sits inside the frame, balances better and usually offers more capacity. Triangle vs downtube covers the trade-offs, and which e-bike battery goes deeper on voltage. The full battery range shows what is currently available.
What you need to have ready
Parts
- The motor system: motor, controller, display and wiring harness
- A battery of matching voltage, plus a charger if one is not included
- A speed sensor and brake cut-off sensors
- Torque arms, for a hub motor
- An inline fuse for the battery positive lead
Tools
- Hex keys and a torque wrench
- A crank puller and a bottom bracket tool (mid-drive)
- A cassette tool and chain whip (hub motor)
- Side cutters and cable ties
- Heat shrink, electrical tape, dielectric grease and medium-strength threadlocker
None of this is exotic. The one piece worth buying properly is the torque wrench, because motor lock rings and axle nuts need correct torque, not “tight by feel”.
How the conversion goes, step by step
The order below follows our detailed installation guide, which has every step with checks.
Hub motor
- Fit the rotor and cassette to the motor wheel, torquing the rotor bolts evenly.
- Remove your old rear wheel and seat the motor axle fully in the dropouts. It must sit flat; never force it.
- Fit the torque arms, anchored to a solid point on the frame.
- Mount the battery, controller and display, and route the motor cable so it cannot bend sharply or touch the rotor or tyre.
Mid-drive
- Remove the pedals (the left one is reverse-threaded), the cranks and the old bottom bracket, then clean the shell threads.
- Test-fit the motor and check clearance at the chainstay. We look for at least 6 to 8mm.
- Mount the motor with the lock rings, then fit the chainring and cranks and check the chainline.
- Mount the battery and connect the cables.
- Program the controller for how you ride. The BBSHD has its own installation guide because it is a bigger job.
Both
- Keep wiring clear of spokes, rotors, chainrings and suspension pivots, and use sleeves where cables rub.
- Fit an inline fuse as close to the battery positive lead as practical.
- Before the first power-on, check every bolt, that the wheels spin freely, and that no cable can reach a moving part at any steering angle.
- Do the first test with the driven wheel off the ground, then confirm the brake cut-off stops the motor.
Mistakes that cause most of the problems
- Buying before measuring. Wheel size, dropout spacing and bottom bracket type decide what fits. Measure first.
- Skipping the torque arm on a hub motor. Axle spin in the dropout is a real failure mode, especially on aluminium frames.
- Mismatched voltage between battery, motor and controller.
- An undersized battery. It limits range and makes the motor work harder than it should.
- Ignoring the drivetrain. A mid-drive pushes motor power through the chain and cassette, so a worn chain or cassette wears out faster and may skip under load.
- Neglecting the brakes. More speed and weight means more stopping power is needed.
- Messy cable routing. Cables that can touch a moving part will fail eventually, and sometimes dramatically.
If something does not behave after fitting, our diagnostic guide to conversion kit faults matches symptoms to likely causes.
Do it yourself or have it fitted?
A hub-motor kit is the more forgiving DIY job. It is mostly a wheel swap, and many confident home mechanics do it in an afternoon with basic tools. A mid-drive means removing the bottom bracket and cranks and setting the chainline and lock-ring torque correctly, so it is the one where we see people book in help. If you do fit it yourself, you rely on the manufacturer’s warranty on the components alone; a kit fitted at our workshop also carries our warranty on the installation.
At the workshop, a straightforward hub-motor fit booked ahead can usually be done the same day, and a standard mid-drive fit the same or next day. We also fit kits bought elsewhere, and if you started a job and got stuck, bring the bike in as it is and we will pick it up from there. Our DIY or book it in guide covers booking, warranty and turnaround in full.
What does it cost?
As an approximate guide, our cost guide (July 2026) puts parts for an entry-level hub-motor build at around £300 to £450, a Bafang mid-drive build at around £550 to £900, and high-power builds at around £700 to £1,300 or more, with fitting on top at around £80 to £120 for a hub motor and £120 to £180 for a mid-drive. These are approximate figures and prices move, so check the current product pages before you budget. The full breakdown shows where the money goes and where you can save.
Ready to choose?
Once you know your frame, your motor type and your battery size, the choice narrows quickly. You can look at the hub and Bafang conversion kits together, and if you want a second opinion on your particular bike, message us on WhatsApp with the bike type, wheel size, dropout spacing and bottom bracket details. If you would rather have it done for you, our Cardiff workshop fits and services conversions at 2 Beresford Road Lane, CF24 1QU.
FAQ
Can any bike be converted to electric?
Most can, provided the frame is sound and the brakes are good. A hub motor suits almost any bike with a usable rear dropout; a mid-drive needs a compatible bottom bracket shell, usually threaded BSA at 68mm, 73mm or, for the BBSHD, 100mm.
Hub motor or mid-drive for hills?
A mid-drive, in most cases. It uses the bike’s gears, so it stays efficient on steep climbs. A hub motor can work on moderate hills, but long steep climbs can heat a smaller hub.
How big should the battery be?
Match the voltage to the motor, then pick the watt-hours for the distance you ride. As a guide, mixed riding uses roughly 10 to 15 Wh per km, so 960Wh gives something like 64 to 96 km. Hillier or loaded riding uses more.
How long does a conversion take?
At our workshop a straightforward hub-motor fit booked ahead is usually same day, and a standard mid-drive fit same or next day. Doing it yourself, allow an afternoon for a hub motor and longer for a mid-drive if it is your first bottom bracket job.
Do I need new brakes?
Not always, but check. More speed and weight demand reliable stopping, so worn pads or marginal brakes should be sorted before you ride. We check brake condition as part of every fitting.
Can I convert a bike with a press-fit bottom bracket?
Not with the BBS01B or BBS02B directly, as they need a threaded shell. A hub motor avoids the issue entirely, which is why it is the usual answer for press-fit frames.
Can you fit a kit I bought somewhere else?
Yes. We check that the kit suits your bike and is complete before we start.
Visit us: 2 Beresford Road Lane, Cardiff, CF24 1QU
Hours: Mon–Fri 11am–6pm • Sat 11am–3pm • Sun closed