DIY / Guides • Mountain E-Bikes
How to Build a Mountain E-Bike: A Detailed DIY Guide (Bafang Mid-Drive vs Rear Hub, Power, Batteries & Setup)
Updated: April 28, 2026 • Reading time: ~25–35 min
DIY e-bike build
Bafang mid-drive
Bafang rear hub
48V / 52V batteries
Mountain bike conversion
⚠️ Safety first: Building an e-bike involves high currents, rotating parts, and faster downhill speeds. Always use a quality battery with a proper BMS, fuse your battery lead, secure wiring away from spokes and chain, and test at low power first. When in doubt, consult a qualified bike mechanic or bring it to our
Cardiff repair shop for a professional build or check.
1) Plan Your Build: What “Mountain E-Bike” Means for Parts
A mountain e-bike build is different from a city commuter build because you’ll ask more from the system: steep sustained climbs, low-speed high-torque work, vibration, mud and water exposure, and higher braking loads on descents.
Define your use-case (be specific)
- Climbing style: short punchy climbs or long alpine climbs?
- Trail access: private land only, or public trails (often stricter rules)?
- Riding goal: “assist to ride longer” vs “moto-like power”.
- Weather: dry vs wet (needs better sealing and cable routing).
Set a realistic budget range
- Budget build: rear hub kit + moderate battery — good value, less torque at slow speed.
- All-around trail: mid-drive kit + quality drivetrain and brakes — best climbing efficiency.
- High power: robust mid-drive + high-discharge battery + upgrades (brakes, chain, cassette).
Your biggest decisions are motor location (mid vs hub), power level, and battery spec. Get those right and the rest of the build becomes straightforward.
2) Choose the Right Donor Mountain Bike (Don’t Skip This)
The donor bike is your “chassis.” A cheap, worn-out MTB can become expensive once you start replacing drivetrain, wheels, suspension, and brakes to handle e-bike loads.
Minimum donor bike checklist
- Frame condition: no cracks, no bent dropouts, no stripped threads.
- Brakes: hydraulic discs strongly recommended for mountains.
- Wheel standard: 27.5″ or 29″ are common; avoid unusual proprietary sizes.
- Axles: thru-axle rear ends are common on modern MTBs; many hub motors are easier with QR — plan accordingly.
- Drivetrain: a wide-range cassette (e.g. 11–46T or 10–51T) helps climbing with mid-drives.
- Bottom bracket info: measure shell width and type before choosing a mid-drive kit.
Measurements to record before buying anything
- Bottom bracket shell width (common: 68–73mm; some fat bikes 100/120mm).
- Bottom bracket type (threaded BSA is easiest for conversion kits).
- Rear dropout spacing (135mm QR, 142/148mm thru-axle, fat 170/190/197mm).
- Brake mounting (disc rotor size and mount type).
- Frame triangle space for battery (or plan for downtube/external mounting).
Pro tip: For a first build, a hardtail MTB with a threaded bottom bracket and good hydraulic brakes is the easiest path. Not sure if your frame will work?
Send us your bike details on WhatsApp and we’ll advise.
3) Motor Choice for Mountains: Bafang Mid-Drive vs Rear Hub
Both mid-drives and rear hub motors can work off-road, but they behave very differently on steep, slow climbs. Here’s how to decide.
| Feature |
Mid-drive (crank motor) |
Rear hub motor |
| Climbing at low speed |
Excellent: uses your bike’s gears to keep motor in an efficient RPM range. |
Good to limited: depends on motor size/winding; can overheat if lugged slowly on steep grades. |
| Drivetrain wear |
Higher: motor power goes through chain/cassette. |
Lower: motor bypasses chain (still pedal wear, but less load). |
| Handling |
Central weight = better balance on technical trails. |
Rear weight bias; can feel “heavier” in the back, especially with battery on rear rack. |
| Installation complexity |
Medium: bottom bracket removal, chainline considerations, gearing. |
Often simpler mechanically, but wheel fitment can be tricky (axle type, dropout, rotor, cassette). |
| Best for |
Steep mountains, technical climbs, efficiency-focused trail builds. |
Fire roads, mixed terrain, value builds, bikes where mid-drive fitment is difficult. |
Bafang mid-drive families (what you’ll see in builds)
Integrated/OEM mid-drives
Bafang M-Series (M400/M500/M600/M620) require a frame designed specifically for them with dedicated mounts and CAN/firmware ecosystem. These are suited to purpose-built or fabricated frames rather than standard MTB conversions.
Bafang rear hub motors for mountain builds
For mountain use, what matters most in a hub motor is torque at low RPM, thermal capacity, and dropout/axle compatibility. Browse our full range of e-hub wheel motors including high-power options up to 5000W. A small lightweight geared hub works well for “assist” builds, while larger hubs handle more heat but add unsprung weight.
4) Power Levels for Mountains: 250W–1000W+ (and Why Torque & Heat Matter More)
“Watts” is only part of the story. Mountain builds are often limited by heat on long climbs and by traction on loose surfaces.
| Class |
Typical feel on climbs |
Who it’s for |
Notes |
| 250–350W |
“Strong legs” feeling; helps maintain cadence. |
Fitness riders, legal-compliance builds, light trails. |
Mid-drive shines here because gears multiply torque. See Bafang 250W mid-drive. |
| 500–750W |
Confident climbs; can tackle steeper grades with proper gearing. |
All-around mountain builds. |
Good balance of battery size, wear, and performance. See our hub motor kits. |
| 1000W+ |
Very strong; can climb steep sections quickly. |
Private land / high-performance builds. |
Requires drivetrain + brake upgrades and a high-discharge battery. See BBSHD 1000W. |
Important: Higher power is not automatically “better” off-road. Too much torque can break traction, snap chains, shred cassettes, and overheat motors if you lug them at low cadence. A well-geared mid-drive at moderate power often climbs better than a higher-power system set up poorly.
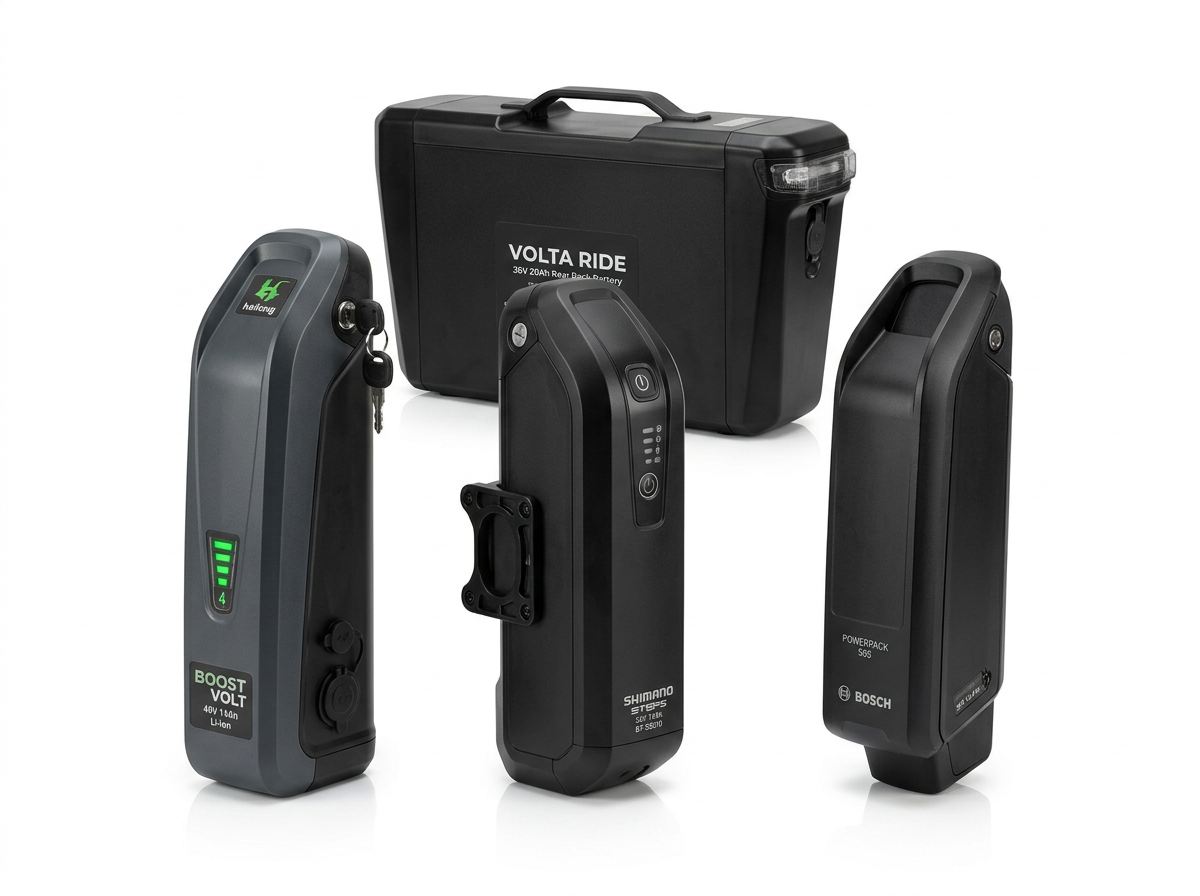
5) Battery Guide: Voltage, Capacity, Discharge Rate, and Real Mountain Range
Your battery choice decides how the bike feels under load. For mountains, prioritise stable voltage under high current and enough watt-hours (Wh) to cover long climbs.
Battery sizing in plain terms
- Voltage (V): Higher voltage delivers the same power at lower current. Common DIY: 36V, 48V, 52V.
- Capacity (Ah): How much charge is stored. More Ah = more range (and more weight).
- Energy (Wh): The best single range number: Wh = V × Ah.
- Discharge rating: Can the battery safely supply the amps your controller demands without excessive voltage sag?
Quick battery recommendations for mountain builds
Range varies wildly with rider weight, tyre choice, terrain, temperature, and how much you pedal. Mountains consume more Wh/km than flat city riding — plan bigger than you think.
Where to mount the battery (and why it matters off-road)
- Inside frame triangle (best): lowest, centred weight; least rattling.
- Downtube mount (common): good centre of gravity; ensure clearance at full suspension compression.
- Rear rack (avoid for MTB): worst handling on technical terrain; more vibration stress.
Battery safety: Use a reputable pack with a real BMS, appropriate connectors, strain relief, and a fuse near the battery. Never ride with damaged cells, swelling, or cut insulation. Store and charge in a safe location away from flammables.
6) Complete Parts List for a Mountain E-Bike Build
Core e-bike components
- Motor system: mid-drive kit or hub motor kit (motor + controller + display).
- Battery: matched voltage, sufficient Wh, sufficient discharge current. Browse all batteries →
- Wiring harness: waterproof connectors preferred; correct length for MTB routing.
- Speed sensor: required by most systems for assist behaviour and speed limiting.
- Cutoff sensors: brake cutoffs (especially useful with hub motors and throttles). Available in our e-bike parts for conversion kits.
Mountain-specific upgrades (highly recommended)
- Brakes: quality hydraulic discs; consider larger rotors for long descents.
- Drivetrain: stronger chain, wide-range cassette, quality derailleur clutch.
- Tyres: aggressive tread and appropriate casing for your terrain.
- Wheels: strong rims and spokes; torque loads can loosen spokes over time. See our bicycle parts.
- Protection: chainstay protector, bash guard, and frame protection tape.
Budget reality: On mountain builds, brakes and drivetrain are not “optional.” If you increase power, you must increase control.
7) Step-by-Step Build Process (Mechanical + Electrical)
Step 1 — Strip and inspect the donor bike
Clean the bike thoroughly so you can spot cracks, bent parts, and worn bearings. Inspect: headset play, wheel bearings, suspension pivots (if full suspension), brake pads/rotors, and drivetrain wear. Replace worn consumables now (pads, chain, cables/hoses). You want a stable baseline before adding motor weight and torque.
Step 2 — Decide: mid-drive build flow vs rear hub build flow
Mid-drive flow (BBS-style)
- Remove cranks and bottom bracket.
- Test-fit motor in BB shell; check clearance and chainline.
- Mount motor, lock rings, and crank arms.
- Install chainring and verify chainline across cassette.
- Route wiring and mount display and controls.
- Battery mount and fuse/connector check.
Browse mid-drive kits →
Rear hub flow (wheel + dropout focus)
- Confirm dropout type/spacing and axle compatibility.
- Install motor wheel with correct spokes/rim (or buy prebuilt).
- Fit cassette/freewheel and rotor; confirm brake alignment.
- Add torque arms (strongly recommended).
- Mount controller and route phase/hall wires safely.
- Battery mount and fuse/connector check.
Browse hub motor kits →
Step 3 — Mount the battery securely (no rattles, no flex)
Use the strongest mount possible: rivnuts/bolts into frame mounts, plus a backup strap for off-road vibration. Protect the pack from rock strikes (downtube guard) and from water spray (mudguard helps). Leave slack for steering and suspension movement, but not enough for cables to snag. Browse all battery options →
Step 4 — Wiring best practices (mountain-proofing)
- Route cables along existing housing paths where possible.
- Keep wires away from: chainring, crank arms, rear tyre, rotor, and suspension pivots.
- Use abrasion sleeves and frame protection where cables contact the frame.
- Provide strain relief at connectors (vibration loosens connections over time).
- Add a fuse near the battery positive lead (common-sense protection against shorts).
Step 5 — First power-on checklist (before your first ride)
- Wheel spins freely; brakes don’t rub excessively.
- All motor mounts tight; cranks torqued; pedals tight.
- Battery mount solid; no movement when you pull it by hand.
- Display powers on; throttle (if present) is smooth; brake cutoffs work.
- Speed sensor reads correctly.
- No cables can touch spokes/rotor/chain at any steering angle or suspension compression.
Step 6 — Shakedown ride (the “save your drivetrain” ride)
Start at the lowest assist level. Listen for clicking, chain skipping, and motor mounts settling. After 10–15 minutes, stop and re-check bolt tightness, connector seating, and spoke tension (hub builds). Gradually increase assist and test on a gentle hill before any long climb.
8) Setup & Tuning for Climbing: Gearing, Cadence, Assist Levels, and Heat Control
Gearing (especially critical for mid-drives)
A mid-drive performs best when it spins at a healthy cadence. On steep climbs, you want to downshift early and keep cadence up. If you “lug” the motor (slow cadence, high load), it heats up fast and can stress your drivetrain.
Mountain gearing rules of thumb
- Use your gears like a car: downshift before the climb gets steep.
- Protect the chain: ease off pedal torque during shifts.
- Prefer cadence over brute force: steady RPM reduces heat.
Assist tuning (keep it rideable, not twitchy)
- Ramp-up: smooth engagement helps traction on loose climbs.
- Max current/power: set for your battery’s safe discharge and your drivetrain strength.
- Throttle behaviour (if used): for off-road, many riders prefer gentle throttle mapping to avoid wheelspin.
Heat management on long mountain climbs
- Pick a gear that keeps the motor spinning — avoid grinding at very low RPM.
- Take short breaks on extremely long climbs; check motor temperature by touch (carefully) or with a sensor if available.
- If the system reduces power (thermal rollback), that’s a sign to lower assist or improve gearing.
9) Troubleshooting: Common Mistakes and Quick Fixes
| Problem |
Likely causes |
Fixes |
| Chain drops or skips under power (mid-drive) |
Poor chainline, worn cassette/chain, derailleur clutch off, too much power during shifts. |
Adjust chainline (ring/spacers), replace worn parts, enable clutch, reduce assist during shifts. |
| Motor overheats on steep climbs |
Lugging at low RPM, too-high power for terrain, insufficient cooling, hub motor too small for duty cycle. |
Gear down, increase cadence, reduce assist, add rest breaks, consider a motor better suited to sustained climbs. |
| Battery voltage sag / cut-outs under load |
Battery can’t supply required amps, cold weather, poor connectors, loose connections. |
Upgrade to a higher-discharge battery, warm the pack, upgrade connectors, re-check crimping and strain relief. |
| Rear hub axle “walks” in the dropout |
Insufficient torque arm support, loose axle nuts, incompatible dropout interface. |
Install proper torque arms, torque axle nuts correctly, confirm dropout compatibility before riding. |
Still stuck? Bring your build to our
Cardiff e-bike repair shop for a diagnostic check — we work on all hub motor and Bafang mid-drive systems.
10) Maintenance Checklist for Mountain E-Bikes
After every 2–3 rides (or any muddy ride)
- Clean drivetrain, check chain lubrication.
- Inspect brake pads and rotor condition.
- Check motor mount bolts and crank bolts for tightness.
- Inspect cable routing for rub points and connector security.
Monthly
- Check spoke tension (especially rear hub builds).
- Check battery mount hardware and vibration wear.
- Inspect tyres for sidewall cuts and sealant levels (tubeless).
Seasonally
- Replace chain as needed (mid-drives wear chains faster).
- Bleed brakes if lever feel changes on long descents.
- Review assist settings for your current terrain and tyre setup.
FAQ
Is a mid-drive always better for mountains?
For steep, slow climbs and technical trails, a mid-drive is often the most efficient because it uses the bike’s gears. But a
rear hub can be excellent for mixed terrain, simpler builds, and riders who want lower drivetrain wear — especially if you choose a hub that can handle sustained climbing without overheating.
48V vs 52V for a mountain build?
Both can work well. 52V systems can feel a bit snappier at the same current limit because power potential is higher, but the real decision is compatibility with your motor/controller and whether your battery can safely deliver the needed amps. Browse our
52V triangle batteries and
48V triangle batteries.
What matters more: watts or torque?
On steep climbs at low speed, torque and heat capacity matter most. A well-geared system delivering manageable, sustained torque often climbs better than a high-power setup that overheats or breaks traction.
Do I need brake cutoffs?
Strongly recommended, especially with hub motors and/or throttles. They add a layer of safety and can reduce wear on both motor and drivetrain. Find brake cutoff sensors in our
conversion kit parts.
Can I get my mountain e-bike build professionally installed?
Yes — we offer full conversion kit installation at our
Cardiff repair shop (Roath, CF24). Send us your donor bike specs and we’ll recommend the right kit and battery, then fit everything for you.
Next step: send us your donor bike specs via WhatsApp or email — bottom bracket width/type, rear axle type/spacing, wheel size, rider weight, and typical climb length — and we’ll recommend the right build (mid-drive vs hub) plus a battery size that matches your mountains.
© All4eBikes • DIY content for educational purposes.